Building a custom PC

#Ol’ Reliable
#Specs:
- CPU: AMD Ryzen 5 5600X
- CPU Cooler: EK AIO 360 D-RGB
- Motherboard: MSI B550 Gaming Edge WiFi
- Memory: G.Skill TridentZ 32GB DDR4 3200 CL14
- Storage: Samsung 970 Evo Plus M.2 2TB
- GPU: Gigabyte RTX 3080 Vision
- Case: Lian Li O11 Dynamic
- Power Supply: Corsair RM 750W
- Case Fans: 6x Corsair iCue QL120
- Fan Controller: Corsair Commander Pro
- Cables: Asiahorse White Sleeved Extensions
I built this PC in November 2020 around the time the chip shortage started in 2020. I was lucky enough to get the 5600X and 3080 the first drop that Best Buy implemented email confirmation for purchase orders, so there weren’t any bot scripts ready to snatch up cards and CPUs. I got the GPU at $769.99 and at the time of writing in Nov. 2021. It’s now $1029.99 on Best Buy. Curse this chip shortage 😡.
This was my second time around building a PC, and this time I wanted something I could actually look into and appreciate the hardware inside. Decided to go with the trendy O-11 Dynamic case (though I personally feel this is one of the most aesthetic cases for ATX builds) and a white-ish theme. I’m pretty happy with how it turned out!
Overall, building one of these is way less tedious than a mechanical keyboard since it’s 1) way less reptitive and 2) there’s no soldering involved. The whole build process took about 2 hours or so to fully assemble. Anyways, onto the build pictures!
#The Spread

Here’s the obligatory box setup for everything in the build. Excuse the messy background 😅.
#Getting started

First we get started by laying out the motherboard (mobo), then placing the parts that go on the motherboard. In this case it’s the CPU, RAM, and the M.2 SSD. The CPU goes in the middle, RAM in the long slots next to the CPU, M.2 underneath the heatsink that says Lightning Gen 2. The GPU slots are the PCIe slots on the bottom, but that goes in last.
There’s also a huge laundry list of things that you need to figure out where they plug into the motherboard. All the slots will labelled on the board itself and on the instruction manual. For my build, I had to plug in the CPU cooler fans + pump, case fan controller, case I/O, case power button, 24-pin motherboard power, and 8-pin CPU power.
#CPU

The CPU before it goes in. AMD and Intel motherboards have different-looking locking mechanisms for securing the CPUs, but they’re just a simple latch. Careful not to bend any pins.
#RAM

The RAM sticks before they go in. Don’t have a picture of me placing them in but they just click into the slots on the motherboard.
#AIO

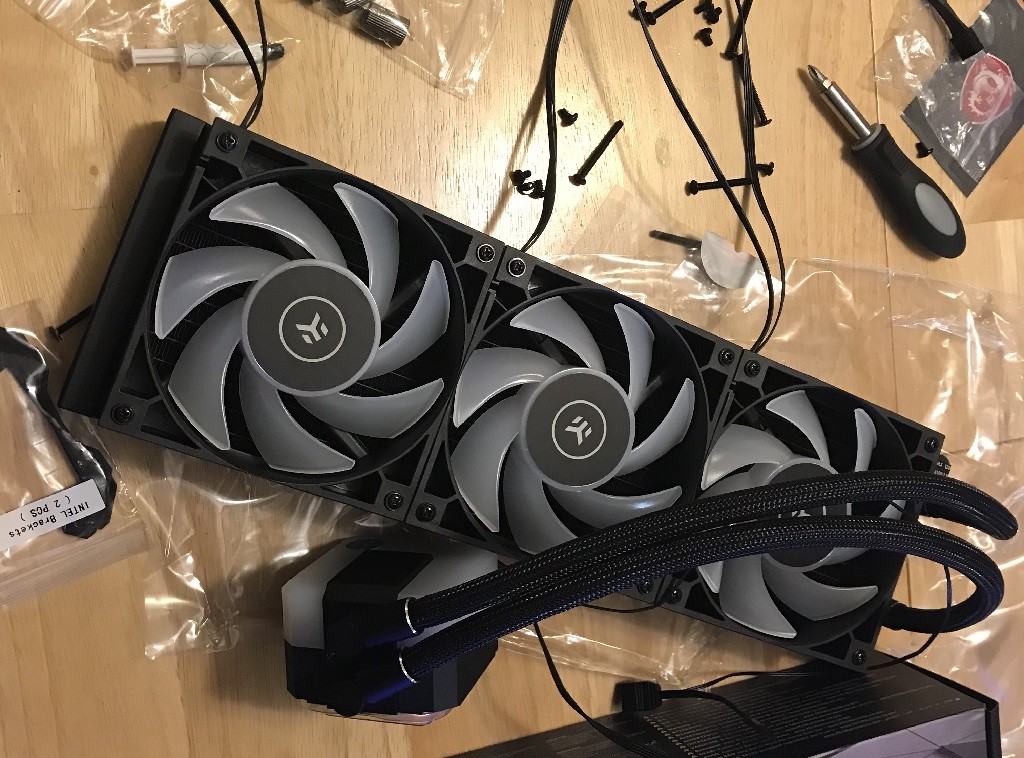
The gorgeous EK AIO 360. I’ve honestly been a fan (no pun intended) of EK’s custom cooling loops, but I don’t think I’m at that level of enthusiast just yet. Plus, I like how EK designed and manufactured their own AIO technology instead of rebranding a generic Asetek AIO. The unique look of the cooling block is also a big plus.
It’s kind of hard to see in the picture, but the cooler comes with thermal paste applied to the cooling block (covered by a plastic cover) so I didn’t have to apply the thermal paste myself. Fortunately, EK kindly adds a small tube of thermal paste (pictured top left) in case of any mess-ups.
#Testing everything so far

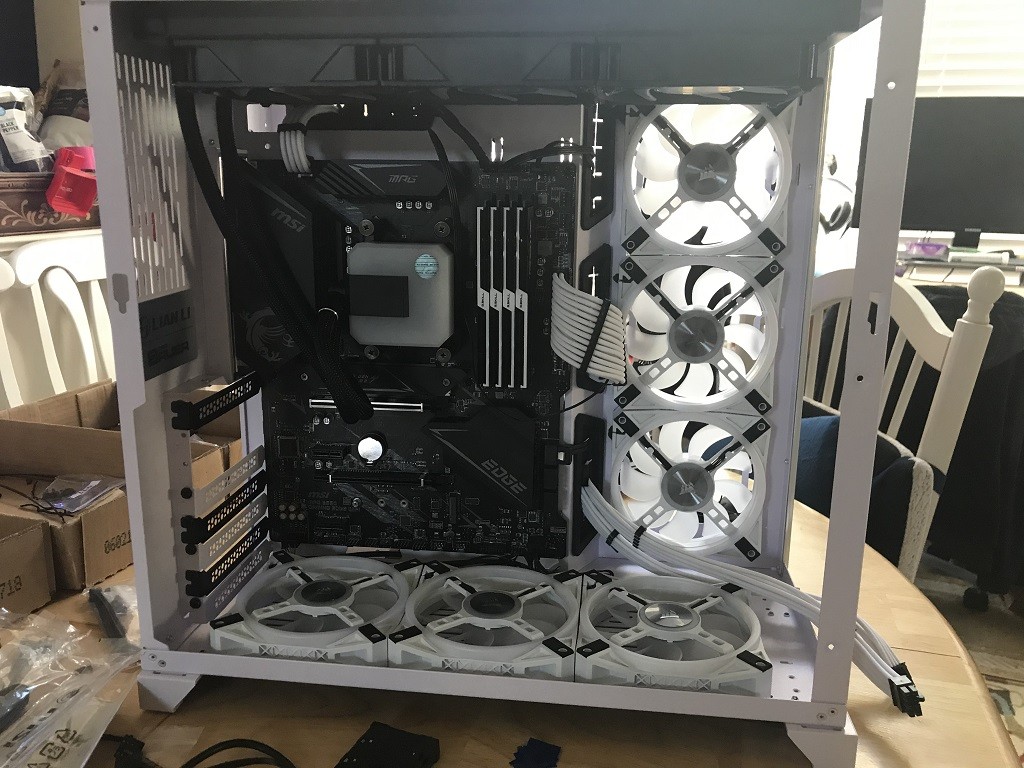
A lot of things happened since the last image, but basically I just screwed the motherboard into the case (don’t forget the I/O shield), screwed in the AIO to the top of the case, and then I plugged the AIO into the motherboard.
After the mobo and AIO, I installed the power supply in the back of the case. One of my favorite parts about this case is that they hid the power supply in the back half of the case as opposed to having the bottom half of the case covered by a power supply shroud. It’s super clever and I don’t think any other cases pull it off as Lian Li does.
For the test, I just plugged in the 24-pin Mobo pin and 8-pin CPU pin (see the white cables plugged in the middle and top left). Fortunately, it booted. I did have flash the BIOS on the motherboard for it to support Ryzen 5000 series processors, but thankfully MSI has a simple flash back feature where you can update it via USB without an operating system. Followed this video by this gentleman and it was pretty straightforward. Now onto the case fans!
#Fans

There was a lot more to case fans than I initially expected before I started planning out my build. How do I plug in 6 fans to the CPU? What fans should be intake/exhaust?
Well, it turns out Corsair sells a fan controller for when you have more than just a few fans to plug into your PC. It plugs into the CPU fan controller slot on the motheboard and then you can control the fans individually using Corsair’s iCue softare. It’s pretty sweet but costs a bit more than I would have preferred, but there aren’t any other fans that had the ring lighting down as well as Corsair’s fans did.
As for intake/exhaust, Hardware Canucks did an in-depth video on this topic (and the same exact case w/ an AIO!). TL;DW, 3 bottom + 3 side intake and 3 top AIO exhaust has the lowest overall temperatures. It makes sense since hot air rises. Putting the exhaust at the top where the hot air will be while having and the intakes bring in cool air should be optimal.
I did a quick test and fortunately (again), the fans worked too! So now all that’s left is the GPU. Here in the pic, I removed the PCIe rails on the lower left side of the case where the GPU will screw into. I also routed two 8-pin connectors from the power supply in the back for the GPU power.
#GPU

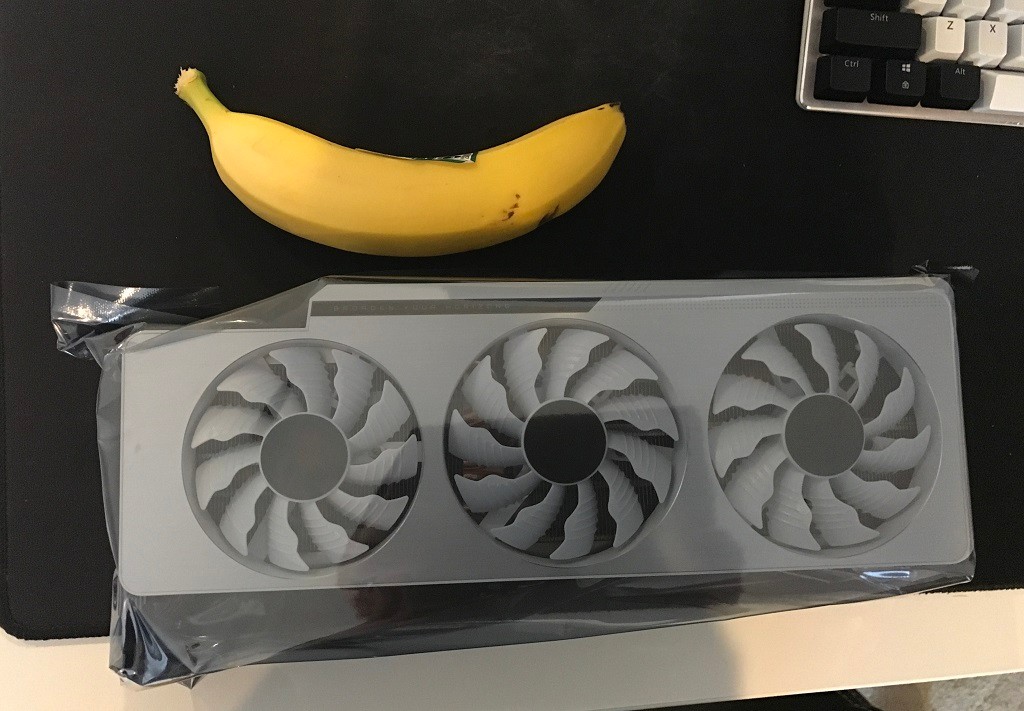
Here is the absolute unit of the RTX 3080 with a banana for scale. The thing is MASSIVE.
#All done

There we go! Fortunately, my University provides a free copy of Windows 10 for all students, so I was able to get a copy of Windows for free. Again, super happy with how the build came out. I’m honestly not sure what I’d change if I had to replace a part… The only part that might change the aesthetics would be RGB RAM, but I kinda like having RAM that matches the colors without lighting.
#Profile view

Here’s the profile view of the whole build assembled. It’s easier to see in this one just how massive the GPU is. An GPU from a few generations ago like a GTX 1080 wouldn’t extend past the motherboard and cover up the fan like this 3080.
I can personally recommend every part in this build in terms of quality and performance. The RTX 3080 and 5600x combination is monstrous. It chews up and spits out any workload you throw at it with ease - compiling this website feels like it’s twice as fast as my old GTX 970 and 4570k (and I’d consider that PC to be pretty fast!). I’m still on the fence about mining crypto on this rig since I don’t want to wear out my GPU, but running graphically-intense games on this has been a breeze. I was extremely hyped to play Cyberpunk 2077 on this (you might be able to tell I’m a Witcher 3 fan from my Quen logo) and it actually ran pretty well with DLSS. Sadly, that game was such a dumpster fire at launch that it made it into the news, but that’s a whole other story.
On that note, that’s all for this post!